Advanced Paint Correction: Using DA vs. Rotary Polishers Safely
Paint correction sits at the center of serious detailing work. Achieving a crisp finish without compromising the clear coat requires knowing how defects form, how machines interact with paint, and where the margin for error truly lies. Dual action polishers and rotary polishers both correct defects, yet they behave very differently under pressure, on curves, and as heat builds. The decision to pick up one or the other is less about loyalty to a tool and more about understanding paint systems, abrasives, pad materials, and the boundaries you will not cross on a given panel.
Why the choice of machine matters more than it seems
Modern OEM clear coats measure roughly 30 to 60 microns out of a total 80 to 140 microns stack on many passenger vehicles. That thin layer stands between you and a costly respray. Remove too much, especially across edges and body lines, and you are through the protection. With those numbers in mind, the promise of a fast correction starts to look like a liability unless you control heat, dwell time, and cut rate.
A dual action polisher spreads load across a random orbit. The pad both rotates and oscillates around an offset bearing. That pattern breaks up heat and reduces the chance of inducing holograms, which is why DAs are favored for finishing. A rotary polisher drives a single axis rotation. The cut is more direct, heat climbs faster, and the finish can show rotary trails if technique or pad choice misses the mark. Used well, a rotary saves time on hard paints and deep defects. Used casually, it creates new problems.
In practice, most advanced corrections combine both machines. The rotary handles initial leveling on durable paint or heavy oxidation. A DA chases the finish and refines the last two to five percent, especially on dark colors that reveal everything under inspection lights.
What actually cuts paint
Compounds and polishes carry abrasive grains that fracture or roll depending on the technology. Modern diminishing abrasives start large and shear down as you work. Non-diminishing abrasives remain a set size, which means you control the cut by time, pressure, and pad selection. Wool and microfiber pads hold more compound and allow abrasive contact to reset quickly. Foam pads moderate the bite and manage heat better at lower cut levels.
The machine is only a motor. The pad and liquid do the work, and the paint system tells you how aggressive you can be. Soft Japanese clear on a mid-2010s sedan responds quickly to microfiber on a DA and may haze if you push it for too long. A hard German clear on an SUV swallows the same combo and asks for more pressure or a rotary with a twisted wool pad to move the needle. Single stage paints, common on older trucks and some restorations, load pads quickly as pigment and oxidized binder come up. Gelcoat on boats is a different animal again, thicker and more heat tolerant, but prone to swirl retention if you stop the cycle too early. Airplane Detailing brings bare aluminum or painted composites into the picture, and both punish excess heat and residue left along rivet lines.
Heat, edges, and the risk budget
Heat accelerates abrasive action and softens the resin in clear coat. A short window of elevated temperature is acceptable on many paints when the pad is moving and the residue stays fluid. Hover on a sharp crease, though, and the same heat concentrates in a sliver of film that thins faster than your measurements suggest. At Xtreme Detailing and Ceramic Coatings, we treat any edge, emblem recess, or panel termination as a red zone. Two layers of masking tape, lower speed, and either a smaller pad or a hand-held finishing stick preserve that edge. If correction is required right up to the break, the last few millimeters are done by hand. You save maybe four minutes by driving across an edge with a rotary. You risk the entire panel for it.
Instrument use is not optional when you set tight tolerances. A paint thickness gauge informs whether you are working with a factory finish or a respray, and it gives you a baseline. If you read 80 to 90 microns total on a hood that should be closer to 120, your plan changes. Infrared thermometers can be helpful during heavy compounding passes, especially on dark colors and on gelcoat in Marine Detailing. You are not chasing numbers for their own sake. You want to understand how quickly heat climbs on a given surface so you can time your working cycle and residue clear-out.
DA vs. Rotary under the lights
A rotary is efficient because each abrasive particle travels the same path with high surface speed. This creates a deep, well defined cut. It also means that any inconsistent pad pressure writes itself as a directional trail. Under a sun gun or strong LED, rotary holograms appear as comma-like arcs that move as you shift your viewing angle. On lighter colors, you might not see them until the car leaves the bay. That is one reason finish work returns to a DA. The orbit scatters micro-marring in a way that the human eye reads as uniform, especially after a Ceramic Coating that adds gloss and refractive depth.
A long throw DA, in the 12 to 21 mm orbit range, levels defects quickly with a microfiber cutting pad and a medium cut compound. You do not generate the same sharp heat spike at a point, and you can work longer on a panel without triggering resin softening that prints trails. The drawback is stall. Free spinning DAs lose rotation on convex curves or if you add too much pressure. As rotation slows, cut rate drops and the pad scrubs. You end up making passes without moving the defect, all while building temperature and residue. Knowing how to keep the pad rotating, or choosing a gear driven DA for difficult contours, keeps correction time predictable.
Choosing a tool for specific paint systems
Centimeters of progress matter less than cause and effect. Start by identifying the paint and the defect type. Random isolated deep scratches, rotary trails from a previous job, wash-induced swirls, etching from bird droppings, sanding marks at 1500 to 3000 grit, or oxidation at the surface all point to different first moves.
Soft clear on a black coupe with wash marring benefits from a DA, microfiber cutting pad, and a quality diminishing compound. The risk of hazing is real after two to three section passes, so panel wipe and inspect early. A rotary could do the job faster, but it raises the chance of trails that you will have to chase anyway.
Hard clear on a large SUV with dealership rotary trails and some shallow RIDS may justify a rotary initial cut. Twisted wool on a medium cut compound at 900 to 1200 rpm, slow arm speed, modest pressure, and a short cycle builds an even plane. Follow with a DA on foam and a fine polish to refine.
Single stage red on an older pickup truck will load pads and disrupt finish clarity if you are not vigilant about cleaning the pad. A DA can push pigment around and leave cloudy patches. A rotary with wool, quick cycles, and frequent pad spur cleaning often moves faster and more predictably, though you still refine by DA for clarity.
Gelcoat on a 30 foot boat laughs at approaches that work on automotive clear. It is thick, it oxidizes, and it can take heat for short bursts. A rotary with wool and a cutting compound is efficient. The finishing stage demands a DA on foam and a glaze or finishing polish to prevent haze under dock lighting. Marine Detailing lives or dies by residue management, because spent compound dries fast in breeze and sun.
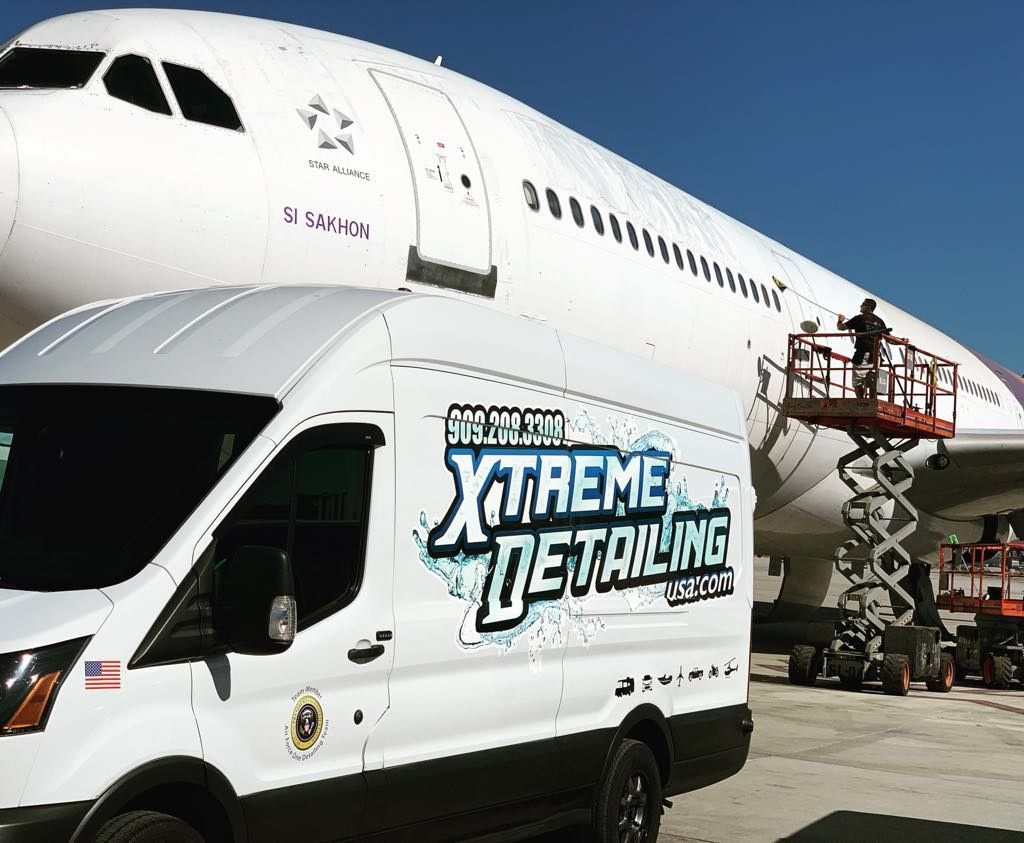
Aircraft finishes vary. Painted aluminum can be thin and requires lower machine speed, gentle pressure, and an obsession with rivets and seams where residue packs and creates halos. Composite surfaces on modern planes tolerate DA correction well, with microfiber used sparingly and plenty of clean pads on hand. In Airplane Detailing, certification, material compatibility, and static concerns set the boundaries before you ever touch the paint.
A practical comparison at the workbench
Here is a compact way to think about machine choice during Paint Correction without turning it into dogma:
- DA strengths: safer heat profile, better finish quality on soft or dark paints, less risk of holograms, excellent for refining after sanding, predictable with foam and microfiber.
- DA limitations: rotation stall on curves, slower initial cut on very hard paints, can haze soft clears with microfiber if overworked.
- Rotary strengths: fast leveling on hard clears and gelcoat, efficient removal of sanding marks at coarser grits, pairs well with wool for heavy defects.
- Rotary limitations: heat builds quickly, risk of holograms, requires tighter technique on edges and contours, more sensitive to pad angle.
- Gear driven DA: a middle path, keeps rotation under load, cuts faster than a free spinning DA, finishes better than a rotary in many cases.
How Xtreme Detailing and Ceramic Coatings balances risk and results
Work quality reflects the choices you decline as much as the ones you make. At Xtreme Detailing and Ceramic Coatings, the plan for a vehicle begins with lighting and measurement. We map thickness across representative panels, note repaints where a magnetic gauge drops to near zero or the ultrasonic gauge reads atypically, and identify previous correction attempts under cross lighting. Only then do we settle on a working combination.
One recurring lesson came from a metallic gray sedan with a thin factory hood reading in the low 80s microns. The car showed plenty of washing Paint Protection Film swirls and a few straight line marks from a winter brush. A rotary would have made short work of the defects, but the reserve on that panel was tight. We used a long throw DA with a short nap microfiber pad and a medium cut compound, two slow section passes, a panel wipe, and then went straight to a fine polish on foam. Defects fell away in stages, and the finish held under high CRI lights. The difference in time compared to a rotary first pass was maybe 20 minutes across the hood, which we judged as cheap insurance.
On the other end, a black hard clear German coupe came in after a body shop blend. The shop had leveled dust nibs with 2000 grit and a fast rotary compound, leaving sharp trails. Here we started with a rotary on a finishing wool pad and a low dust compound at modest rpm. The machine stayed flat and never parked near edges. We wiped frequently and checked with a polarized light, then moved to a DA on a firm foam to remove the residual ghosting. The car finished with depth that a DA-only approach would have struggled to build in a reasonable window.
The Xtreme Detailing and Ceramic Coatings test spot workflow
Every strong correction starts with a test spot that tells the truth. Skipping it is how you either waste time or overthin a panel.
- Mask a 2 by 2 foot area that includes a contour or body line so you can see how the combo behaves on both flat and curved sections.
- Start with the least aggressive pad and polish you believe could work, run two slow passes, then inspect under different lights. Scale up only as needed.
- Record your exact combo, speed, passes, and wipe sequence. If a DA on microfiber cuts but hazes, note whether a foam refining step clears it.
- Try your likely rotary combination in the same square if you suspect time savings on the rest of the vehicle. Compare not just speed but finish under a sun gun.
- Confirm the cycle that achieves the goal with minimal film removal, then execute it consistently across the vehicle with pad swaps scheduled every panel or two.
That short sequence does not embellish a process. It prevents surprises when you reach a thin hood or blend panel. At Xtreme Detailing and Ceramic Coatings, we log those outcomes so the next vehicle with the same paint code and similar condition starts from knowledge, not guesswork.
Pad priming, working cycles, and keeping the face clean
Pad priming smooths the first minute of abrasive action. For microfiber and wool, spread a thin, even film of compound into the fibers and blow it out lightly so you are not slinging liquid. For foam, a cross pattern with a few pea sized drops is plenty. Your first section pass should feel controlled, not gritty. Keep the pad flat, watch that a free spinning DA maintains rotation, and manage arm speed. A good target is 1 to 2 inches per second with slight overlap. Faster is not always more productive, especially if your abrasive system needs some time to break down.
Cleaning on the fly extends consistency. A quick pass with a pad brush or compressed air removes spent abrasive and paint residue. Foamed pads respond to a microfiber towel pressed into the face while the machine spins at low speed, which pulls out excess liquid. Dirty pads are dull blades. They heat up faster and smear residue, which then clouds your inspection. On single stage paints and oxidized gelcoat you need more pads than you think, sometimes double your usual count.
Residue, oils, and how coatings react
After compounding, the paint may look relatively clean, but polishing oils can fill micro-marring and blur the truth. If your plan includes a Ceramic Coating, the surface must be free of films that interfere with bonding. Use a panel wipe that is compatible with your clear and avoids aggressive swelling. Run a two step wipe when moving from a heavy compound to a finishing polish. The first removes bulk oils and dust, the second confirms clarity. Then allow a short rest before applying a coating, particularly if the panel was warm during correction. You want the solvents from compounds and panel wipes to flash thoroughly.
For Paint Protection Film, installers often prefer a slight polish with a finishing foam to ensure maximum clarity under the film, then a wipe that leaves no residue. Aggressive cut before PPF risks edges that do not hold or adhesive issues where solvents linger. Discuss the correction plan with whoever is handling the film so both processes play well together.
Working around PPF edges, vinyl, and trim
Rotary wool will pull at exposed edges if you catch them at the wrong angle. A DA is safer near PPF terminations and vinyl graphics, but still, mask edge lines and reduce pressure as you approach. If you must blend correction across a film line, treat the last centimeter like an edge: smaller pad, lower speed, and no rushing. On textured plastics, avoid compound stain by taping them first. Some modern compounds are less prone to white staining, yet wiping residue out of grain takes longer than preventative taping every time.
Sanding marks and the bridge between tools
When you step into sanding to correct defects that polishing alone cannot touch, tool selection shifts. DA sanding at 3000 grit levels texture in a controlled way and leaves a uniform scratch pattern that a DA with microfiber erases efficiently. If you drop to 2000 grit to flatten nibs, a rotary on wool can reclaim the surface faster, then a DA refines. The bridge is about predictability. If you are learning to finish at a high level, start with 3000 DA sanding to understand how scratches translate to cut rate and finish. Rotary correction of 1500 grit marks is an expert move, and it shortens the time window where a mistake becomes a rework.
Lighting, inspection, and honesty with defects
LED lights with high CRI reveal micro-marring and haze. Halogens still have value because they mimic the sun’s punch and show trails differently. Check from multiple angles and distances. If a scratch catches a fingernail, you can reduce its visibility, but total removal may not be safe. On a luxury SUV with a deep key mark, you might settle for 60 to 80 percent improvement rather than risk a strike-through. Communicating that line is part of professional Auto Detailing. Overselling perfect outcomes from flawed starting points helps nobody.
Crossovers with RV Detailing, Marine Detailing, and Airplane Detailing
Large surfaces change workflow more than technique. RV Detailing brings acres of fiberglass and gelcoat, ladder work, and variable film thickness from one panel to the next. Keeping your cycle short, your pads clean, and your body comfortable avoids the fatigue that causes sloppy passes by hour six. On boats, salt and chalky oxidation attack pads and shorten their usable window. You will rotate pads every half panel at times. Aircraft add rivets, anti-static concerns, and inspection standards that penalize trapped residue. Across all three, a DA is safer for finishing on complex curves and around sensitive features. A rotary remains your heavy lifter against oxidation and sanding marks on compatible materials.
Environment and dust control that help every step
Polishing throws particles into the air. If your shop also handles Window Tinting, you already know dust is the enemy. Segment the bay or run correction before tint installs to keep airborne debris down. A tidy cable management plan prevents the cord from touching corrected panels and dragging abrasive dust. Use clean, color coded towels for compound removal and finish polish removal. Cross contamination between the two is one way to create faint streaks that reappear under sunlight.
Common mistakes and how to sidestep them
Rushing panel wipes leaves oils that hide marring until a coating cures, then it is locked under a hard shell. Overheating a rotary pass on a small pillar and printing a trail that refuses to finish on foam forces extra cycles and more removal than planned. Letting a DA stall across a convex fender and continuing to push wastes time and builds heat with little progress. Working too large an area with a fast moving arm spreads your effort thin. All of these share a root cause: not listening to the feedback the paint gives, not checking often enough, and not adjusting the plan on the fly.
A detail that sticks in mind involved a white single stage van with severe oxidation. The first technician began with a DA and microfiber, moving slowly and wiping often. Progress was glacial, and pads loaded instantly. We reset with a rotary, wool, a heavier cut compound, and short overlapping passes. The front half of the van corrected in two hours to a uniform, bright finish, which we then refined with a DA on foam. The DA-first approach was not wrong, but the rotary-first sequence was the right tool for that material and defect.
When a coating or film changes your finish goals
If the vehicle is receiving a Ceramic Coating, you want a finish that is truly defect free under critical light. The coating will add gloss and slickness, but it also locks in what you leave behind. That pushes you toward a DA finishing step and a disciplined wipe protocol. If the vehicle is headed for Paint Protection Film, your target is slightly different. You care most about removal of high spots that would telegraph through the film and overall clarity. Chasing the last whisper of micro-marring at the cost of more removal may not be wise if the film will hide what remains. The art is knowing when stop, because more correction is not always more value.
The last pass mentality
A strong correction has a rhythm. The first passes feel purposeful as defects vanish. The middle cycles feel methodical as you normalize each panel. The last pass should feel slow and careful, with attention to edges, wipe marks, and uniformity. That mindset prevents the last minute mistake that etches your memory for weeks. At Xtreme Detailing and Ceramic Coatings, we end each vehicle with a quiet walk around under two types of light, then a final glove test along edges to ensure residue is out of seams. If a tiny section bothers us, we correct it. That extra ten minutes protects the hours invested before it.
Safe, high level Paint Correction is not an accident. It is a series of choices grounded in the physics of your tools, the chemistry of your abrasives, and the tolerance of the surface in front of you. The DA and rotary are both capable. The professional judgment is in knowing which one to use, how long to run it, and when to hand the job off to the other. When that judgment is consistent, coatings bond better, films lay flatter, and finishes hold their clarity well beyond the first wash.
Xtreme Detailing and Ceramic Coatings
15686 Athena Dr, Fontana, CA 92336
(909) 208-3308
FAQs About Car Detailing Services
How much should I spend on car detailing?
The cost of car detailing can range from $100 to $300 for standard services, while premium packages like paint correction or ceramic coating can cost several hundred to over a thousand dollars. The right budget depends on your vehicle’s condition and the level of protection you want.
Is detailing worth the money?
Yes, professional detailing is a worthwhile investment. It helps protect your vehicle’s paint, maintains the interior, and preserves resale value. In areas like Fontana, CA, where sun exposure and dust are common, regular detailing can significantly extend your car’s lifespan.
How often should you fully detail your car?
A full detailing service is typically recommended every 4 to 6 months. However, this can vary depending on driving habits, weather conditions, and whether your vehicle has protective treatments like ceramic coating.
What time of year is best for car detailing?
Spring and fall are ideal times for car detailing. Spring helps remove winter buildup, while fall prepares your vehicle for harsher weather conditions. In Southern California, detailing year-round is beneficial due to constant sun exposure and environmental contaminants.
How long does car detailing last?
The results of detailing can last anywhere from a few weeks to several months, depending on the services performed and how well the vehicle is maintained. Protective options like ceramic coating can extend these results significantly.
Do I need ceramic coating after detailing?
While not required, ceramic coating is highly recommended after detailing. It adds a durable layer of protection, enhances shine, and makes future cleaning much easier, especially in high-heat environments like Fontana.